GTM snippet

Sunday, September 29, 2019

Steps how to run impex

Follow the below steps to run the impex

1.Make sure your server is up and running (hybrisserver.bat)

2.Log on to "https://electronics.local:9002/login.jsp

3.By default Username is: admin and Password is : nimda

4.Go to Console 
5.Select Impex Import
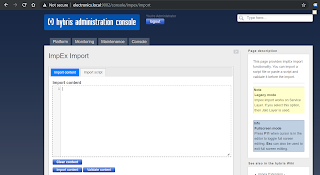
6.Paste your impex in the white section below Import Content 

7.Click on Validate Content, If no error occurs then click on Import Content  

How to add components to custom page!

In this bolg we are adding 2 Components (CMSParagraph, SimpleBannerComponent)

Run the following impexs and you will be good to go
File name is cms-responsive-content.impex

#Macros for impex

$contentCatalog=electronicsContentCatalog

$contentCatalogName=Electronics Content Catalog
$contentCV=catalogVersion(CatalogVersion.catalog(Catalog.id[default=$contentCatalog]),CatalogVersion.version[default=Staged])[default=$contentCatalog:Staged]
$productCatalog=electronicsProductCatalog
$productCatalogName=Electronics Product Catalog
$productCV=catalogVersion(catalog(id[default=$productCatalog]),version[default='Staged'])[unique=true,default=$productCatalog:Staged]
$picture=media(code, $contentCV);
$image=image(code, $contentCV);
$media=media(code, $contentCV);
$page=page(uid, $contentCV);
$contentPage=contentPage(uid, $contentCV);
$product=product(code, $productCV)
$category=category(code, $productCV)
$siteResource=jar:de.hybris.platform.electronicsstore.constants.ElectronicsstoreConstants&/electronicsstore/import/sampledata/contentCatalogs/$contentCatalog
$productResource=jar:de.hybris.platform.electronicsstore.constants.ElectronicsstoreConstants&/electronicsstore/import/sampledata/productCatalogs/$productCatalog
$jarResourceCms=jar:de.hybris.platform.electronicsstore.constants.ElectronicsstoreConstants&/electronicsstore/import/sampledata/cockpits/cmscockpit


1.Create a CMSParagraph Component

INSERT_UPDATE CMSParagraphComponent;$contentCV[unique=true];uid[unique=true];name;&componentRef;;;;content

;;SaleHeadingComponent;Sale Heading Paragraph Component;SaleHeadingComponent;;;;Limited Time Sale Hurry Up!

1.1 Create a SimpleBannerComponent

INSERT_UPDATE SimpleBannerComponent;$contentCV[unique=true];uid[unique=true];name;&componentRef

;;SaleBannerComponent;Sale Banner Compoonent; SaleBannerComponent

2.Update The component to Page template

INSERT_UPDATE ContentSlotName;name[unique=true];template(uid,$contentCV)[unique=true][default='PhonePageTemplate'];validComponentTypes(code);compTypeGroup(code)

;SaleHeading;;;wide
;SaleBanner;;;wide

3.Update the Content Slot Global

INSERT_UPDATE ContentSlot;$contentCV[unique=true];uid[unique=true];name;active

;;SaleHeadingSlot;Sale heading cotent slot;true
;;SaleBannerSlot;Sale Banner;true


4.Add Content Slot to PageTemplate

INSERT_UPDATE ContentSlotForTemplate;$contentCV[unique=true];uid[unique=true];position[unique=true];pageTemplate(uid,$contentCV)[unique=true][default='PhonePageTemplate'];contentSlot(uid,$contentCV)[unique=true];allowOverwrite
;;SaleHeadingComponent-PhonePage;SaleHeading;;SaleHeadingSlot;true
;; SaleBannerComponent -PhonePage; SaleBanner;; SaleBannerSlot;true

4.1 Update the Media

INSERT_UPDATE Media;$contentCV[unique=true];code[unique=true];@media[translator=de.hybris.platform.impex.jalo.media.MediaDataTranslator];mime[default='image/jpeg'];folder(qualifier)[default='images'];altText

;;SaleBanner.png;$siteResource/images/banners/phonepage/SaleBanner.png;;;"Sale Banner Image"

4.2 Add media Object to banner component

UPDATE SimpleBannerComponent;$contentCV[unique=true];uid[unique=true];$picture[lang=$lang]
;; SaleBannerComponent;SaleBanner.png


5.Update the cmsComponent

INSERT_UPDATE ContentSlot;$contentCV[unique=true];uid[unique=true];cmsComponents(uid,$contentCV)

;;SaleHeadingSlot;SaleHeadingComponent
;; SaleBannerSlot; SaleBannerComponent


6. Add the component  to the jsp file in my case its phone.jsp


<template:page pageTitle="${pageTitle}">
           <div class="SaleBanner">
              <cms:pageSlot position="SaleBanner" var="feature">
                         <cms:component component="${feature}" />
              </cms:pageSlot>
             </div>
         
           <div class="SaleHeading">
              <cms:pageSlot position="SaleHeading" var="feature">
                          <cms:component component="${feature}" />
              </cms:pageSlot>
              </div>
         
         
</template:page>

7. For CSS you can make following changes in style.css file

.SaleHeading{
    font-weight: bold;
    margin-right: 5px;
    color: #D4AF37;
    font-size: 35px;   
}
.SaleBanner{
          width: 30%;
          visibility: true;
          heigh: 30%; 
}

8.Paste the image to the following destination

electronicsstore/resources/electronicsstore/import/sampledata/contentCatalogs/electronicsContentCatalog/images/banners/phonepage/SaleBanner.png

9. Out Come will be


Sunday, September 22, 2019

How to add page to your custom navigation node


You need to make following changes in Impex file

File Name: cms-responsive-content.impex(core data)

1 . Create a Page template

INSERT_UPDATE PageTemplate;$contentCV[unique=true];uid[unique=true];name;frontendTemplateName;restrictedPageTypes(code);active[default=true]

;;PhonePageTemplate;Phone Page;phone/phone;ContentPage

2 . Create a content page

INSERT_UPDATE ContentPage;$contentCV[unique=true];uid[unique=true];name;masterTemplate(uid,$contentCV);label;defaultPage[default='true'];approvalStatus(code)[default='approved'];homepage[default='false'];previewImage(code, $contentCV)[default='ContentPageModel__function_preview']

;;phone;Phone Page;PhonePageTemplate;phone

3. Add content slots to page

INSERT_UPDATE ContentSlotName;name[unique=true];template(uid,$contentCV)[unique=true][default= PhonePageTemplate];validComponentTypes(code);compTypeGroup(code)

;SiteLogo;;;logo
;HeaderLinks;;;headerlinks
;SearchBox;;;searchbox
;MiniCart;;;minicart
;NavigationBar;;;navigation
;TopContent;;;wide
;SideContent;;;narrow
;Footer;;;footer
;TopHeaderSlot;;;wide
;MiddleContent;;;wide
;BottomHeaderSlot;;;wide
;PlaceholderContentSlot;

4. Bind content slots to page template

INSERT_UPDATE ContentSlotForTemplate;$contentCV[unique=true];uid[unique=true];position[unique=true];pageTemplate(uid,$contentCV)[unique=true][default='PhonePageTemplate'];contentSlot(uid,$contentCV)[unique=true];allowOverwrite

;;SiteLogo-PhonePage;SiteLogo;;SiteLogoSlot;true
;;HomepageLink-PhonePage;HomepageNavLink;;HomepageNavLinkSlot;true
;;NavigationBar-PhonePage;NavigationBar;;NavigationBarSlot;true
;;MiniCart-PhonePage;MiniCart;;MiniCartSlot;true
;;Footer-PhonePage;Footer;;FooterSlot;true
;;HeaderLinks-PhonePage;HeaderLinks;;HeaderLinksSlot;true
;;SearchBox-PhonePage;SearchBox;;SearchBoxSlot;true
;;TopHeaderSlot-PhonePage;TopHeaderSlot;;TopHeaderSlot;true
;;MiddleContentSlot-PhonePage;MiddleContent;;MiddleContentSlot;true
;;BottomHeaderSlot-PhonePage;BottomHeaderSlot;;BottomHeaderSlot;true
;;PlaceholderContentSlot-PhonePage;PlaceholderContentSlot;;PlaceholderContentSlot;true

5. Create a jsp for page template

<%@ taglib prefix="c" uri="http://java.sun.com/jsp/jstl/core"%>
<%@ taglib prefix="template" tagdir="/WEB-INF/tags/responsive/template"%>
<%@ taglib prefix="cms" uri="http://hybris.com/tld/cmstags"%>

<template:page pageTitle="${pageTitle}">

                <h2>Phone item Page</h2>
             
</template:page>

Location for this jsp will be:
/bolgstorefront/web/webroot/WEB-INF/views/responsive/pages/phone/phone.jsp

After the above changes you will find this page linked to your navigation node


In next blog we will learn how to add custom component to our page. 

Saturday, September 21, 2019

How to add Custom Node in Navigation Node


Make the following changes in the impex file, anything that starts with $ in impex are known as macros

File Name: cms-responsive-content.impex(sample data)
1.

INSERT_UPDATE CMSLinkComponent;$contentCV[unique=true];uid[unique=true];name;url;&linkRef;&componentRef; target(code)[default='sameWindow'];$category;$product;


;;PhoneLink;Phone Link;/phone;PhoneLink;PhoneLin;;;;

2. Now make a Controller for this in you storefront extension


@Controller
@RequestMapping("/phone")
@Scope("tenant")
public class PhonePageController extends AbstractPageController
{
              public static final String PHONE_CMS_PAGE = "phone";
              @RequestMapping(method = RequestMethod.GET)
              public String getPage(final Model model) throws CMSItemNotFoundException
              {
                  final ContentPageModel contentPageModel =                                                  getContentPageForLabelOrId(PHONE_CMS_PAGE);
                             storeCmsPageInModel(model, contentPageModel);
                             setUpMetaDataForContentPage(model, contentPageModel);
                             return getViewForPage(model);
              }
}

3. Create a navigation node


INSERT_UPDATE CMSNavigationNode;uid[unique=true];$contentCV[unique=true];name;parent(uid, $contentCV);links(&linkRef);&nodeRef

;PhoneNavNode;; Phone;ElectronicsNavNode;PhoneLink;PhoneNavNode


   4. Update the CMS Naviagtion node make the entry of our node"PhoneNavNode"

INSERT_UPDATE CMSNavigationNode;uid[unique=true];$contentCV[unique=true];name;parent(uid, $contentCV);&nodeRef;children(uid,$contentCV)


;ElectronicsCategoryNavNode;;Categories;ElectronicsNavNode;ElectronicsCategoryNavNode;BrandsNavNode,DigitalCamerasNavNode,FilmCamerasNavNode,HandheldCamcordersNavNode,WebcamsNavNode,PowerSuppliesNavNode,FlashMemoryNavNode,CameraAccessoriesNavNode, PhoneNavNode


INSERT_UPDATE CMSNavigationNode;uid[unique=true];$contentCV[unique=true];name;&nodeRef;children(uid,$contentCV);links(&linkRef);

;PhoneNavNode;;;PhoneNavNode

5. Now make an entry in CMS Navigation Entry
INSERT_UPDATE CMSNavigationEntry;uid[unique=true];$contentCV[unique=true];name;navigationNode(&nodeRef);item(CMSLinkComponent.uid,CMSLinkComponent.$contentCV);             

;PhoneNavNodeEntry;;Phone Nav Node;PhoneNavNode;PhoneLink;

Now make the following changes in another file 
File name : cms-responsive-content_en.impex(sample data)

1. Update the CMS link component

UPDATE CMSLinkComponent;$contentCV[unique=true];uid[unique=true];linkName[lang=$lang]

;;PhoneLink;"Phone"

 2. Update the CMS Navigation Node

UPDATE CMSNavigationNode;$contentCV[unique=true];uid[unique=true];title[lang=$lang]

;;PhoneNavNode;"Phone"


All Above steps  will add your node in Navigation node, now in next blog we will learn how to add page to this custom nav node.


Friday, July 19, 2019

Setting Eclipse IDE


  • Create a new folder for the workspace, you can define any name but I prefer giving a related name projectnameWorkspace in my case it is : blogWorkspcae


  • Open Eclipse
  • Choose workspace , click on browse and select the folder we created above “blogWorkspace”


  • Fresh Eclipse will open


  • Goto Project and switch off Build Automatic


  • Go to file  click on import


  • Select Existing Projects into Workspace form general click next


  • Select the root directory as  “E:\blog67\hybris” click on finish


  • If in case you face any such error then no need to worry just close the error and click on cancel


  • It will look something like this and you are now good to go with eclipse.


How to install B2C accelerator


Steps with screenshots: -
“Before going for these steps make sure you have java installed in your systems”
  • Download the zip file for Hybris 6.7 (approx. size is 1.6GB).
  • Create a new folder in any drive by any name, I prefer giving the project name with version example blog67.


  • Unzip that downloaded zip file into this folder named <blog67>.


  • After Extraction folder<blog67> will have certain folders


  • Now we will run command “install.bat –r  b2c_acc” path will be <DRIVE>:<FOLDERNAME>:<INSATLLER>:install.bat  -r  b2c_acc

B2c_acc mean we are installing b2c recipe (b2cà business to consumer)

After running it will look like

  • Now we will create an Module gen<will be explaining in the later post  why we created> run command “ant modulegen”


Give the package name as accelerator ,  then press enter now it will ask for  package name provide any package name or press enter it will choose the default package name . After successful done it will look like this


  • Do the required things it is asking for like make the entries in localextensions.xml


{ add these extensions in localextensions.xml file  this file is in hybrisàconfigàlocalextensions.xml
<extension name='bolgfulfilmentprocess' />
<extension name='bolgcockpits' />
<extension name='bolgcore' />
<extension name='bolgfacades' />
<extension name='bolgtest' />
<extension name='bolginitialdata' />
<extension name='bolgstorefront' />
}
and removing few extensions 
   <extension name='yacceleratorcockpits' />
   <extension name='yacceleratorinitialdata' />
   <extension name='yacceleratorfulfilmentprocess' />
   <extension name='yacceleratorstorefront' />

  • Run command “ant”


  • Run command “ant initialize” after build successful  you will get initialized done message


  • Now to check you storefront you need to make entries in your host file

“127.0.0.1 apparel-uk.local apparel-de.local electronics.local powertools.local”
Location of host file is “C:\Windows\System32\drivers\etc”
  • After making entries in host file run command “hybrisserver.bat”


  • When you see the message “Server startup in xxxxx ms”


  • Hit the URL : https://localhost:9002/            you will see the HAC console “ user:admin” “password:nimda”


Monday, June 24, 2019

Hybris Architecture


Hybris Commerce suite is highly flexible. It is divided into several packages. These packages are nothing but individual Modules.  All of these packages rely on more basic functionality provided by the hybris Platform.
·       Platfrom
·       PCM
·       Commerce
·       Channel

These packages are bundles of functionality assembled for a certain range of business functionality

Hybris has two architecture
1.       Basic Architecture
2.       Layer Architecture

Basic Architecture

Platform

  • Consists of  standard set of extensions
  • Hybris server
  • Build Framework
  • Extension: technical structure of a module, can contain business logic type definition , other database application
  • Configuration files
  • Platform is the base for every extension.

PCM(Product Cockpit Module )

  • One source for all product data
  • Sync with external systems well
  • Production data publication into different catalog
  • Easy to define work flows
  • All kind of Import and Export related to data
  • Media Management

Commerce

  • Sales and  merchandizing for companies (pricing, multi-brand, multi-store, tax management, etc )
  • Marketing (Promotions, coupons , etc )
  • Multi channel publishing
  • E-commerce services(order, customer support, warehousing)

Channel
  • Mobile
              Mobile web store integration
              Store Locator
              WCMS integration

  • Customer service
              Call center application
              Pre and Post order process at finger tips
              Compartible with low end machines
  • Print
              Supports all means of automation publications
  • WCMS
              Multi-Store scenarios
              User interface for static and dynamic web site content

Overview diagram of basic architecture

Layer Architecture


The hybris Commerce Suite contains several layers, each of which has a different function and data abstraction level.

  • Cockpits, hmc, WebServices:

Layer which interacts with front user, where objects are represented for interaction like: add to cart, product description, passwords for user account this layer basically lets user to play with an object in hybris platform via graphical user interface

This enables organizations to manage about structure information and catalogs in high-volume and collaborative environments.

  • ServiceLayer Framework  and Infrastructure Services:

Provides the Java Application Programmer's Interface (API) for objects in the hybris Commerce Suite, the hybris API. The hybris ServiceLayer relies on so-called models, which are pojo objects. Business logic is written is this layer with other functionality such as Pricing, Classifications, Security, Transactions, Sessions


  • Type layer:

Definitions of Business objects and their attributes are made on this layer in the form of item.xml file.    


  • Persistence Layer:

Deals with the abstraction of Data from database, caching, clustering. We generally do not get in contact with this layer as it is transparent and does not require any interaction from our side.


  • Database:

Database is an important component in hybris as it makes the data held in hybris commerce suite .
We can configure any database. By default hybris follows hsql as a database.

Note: Hybris uses layer architecture to keep the data segregated.  Specific layer for specific data to work upon.