Steps with screenshots: -
“Before going for these steps make
sure you have java installed in your systems”
- Download the zip file for Hybris
6.7 (approx. size is 1.6GB).
- Create a new folder in any drive
by any name, I prefer giving the project name with version example blog67.
- Unzip that downloaded zip file
into this folder named <blog67>.
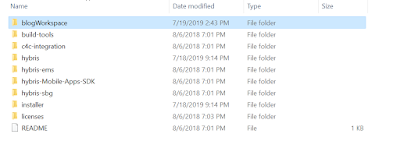
- After Extraction folder<blog67>
will have certain folders
- Now we will run command “install.bat
–r b2c_acc” path will be <DRIVE>:<FOLDERNAME>:<INSATLLER>:install.bat
-r b2c_acc
B2c_acc mean we are installing b2c
recipe (b2cà
business to consumer)
After running it will look like
- Now we will create an Module
gen<will be explaining in the later post why we created> run command “ant modulegen”
Give the package name as
accelerator , then press enter now it
will ask for package name provide any
package name or press enter it will choose the default package name . After
successful done it will look like this
- Do the required things it is
asking for like make the entries in localextensions.xml
{ add these extensions in
localextensions.xml file this file is in
hybrisàconfigàlocalextensions.xml
<extension
name='bolgfulfilmentprocess' />
<extension name='bolgcockpits'
/>
<extension name='bolgcore'
/>
<extension name='bolgfacades'
/>
<extension name='bolgtest'
/>
<extension
name='bolginitialdata' />
<extension name='bolgstorefront'
/>
}
and removing few extensions
<extension name='yacceleratorcockpits' />
<extension name='yacceleratorinitialdata' />
<extension name='yacceleratorfulfilmentprocess' />
<extension name='yacceleratorstorefront' />
- Run command “ant initialize” after
build successful you will get
initialized done message
- Now to check you storefront you
need to make entries in your host file
“127.0.0.1 apparel-uk.local
apparel-de.local electronics.local powertools.local”
Location of host file is “C:\Windows\System32\drivers\etc”
- After making entries in host file
run command “hybrisserver.bat”
- When you see the message “Server
startup in xxxxx ms”


